|
HULL
ASSEMBLY - Cut the Stern
|
|
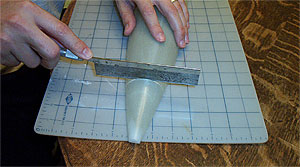
1.
Place the upper hull on an appropriate work area and locate
the scribed cutting line. It is an arc approximately 3.5
inches from the stern of the hull. Utilize a razor saw
for the cutting process. The thinner the blade, the less
material will be lost during the cutting process. This
will allow for a tight fit between the two parts once
the hull is assembled.
NOTE:
using the Dremel and cut off wheel is not recommended
for this procedure. |
|
|
2.
Place the razor saw on the scribed line. Gently draw the
saw across the line to ensure that the blade is following
the scribing perfectly. Continue to saw until the stern
is separated. |
|
|
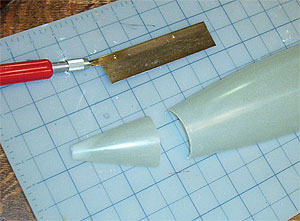
3.
If done carefully, you should have two parts with a perfectly
matched seam. This will enhance the appearance of the
hull when the stern piece is joined to the bottom of the
hull -- which is the next step! |
|
|
|
| |
Next |
|
|
Did
You Know?
Webster's
dictionary defines kerf as: "the
channel made by a saw, or the width of such channel".
When
sawing on models remember: the thinner the saw blade,
the narrower the kerf!
|
|