1.
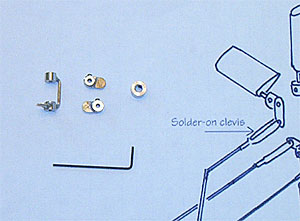
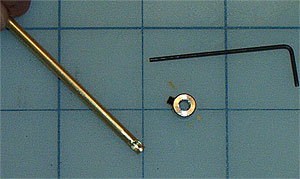
Your Permit kit supplies a drawing of the
most effective linkage arrangement for your boat. The
supplied parts eliminate most of the fabrication required.
From left to right are the rudder jumper, two stern
plane control links, a wheel collar for joining the
two stern plane control rods and an allen wrench for
tightening the set screws.
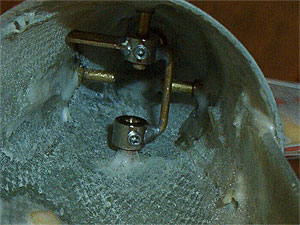
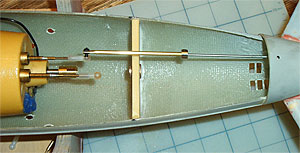
2.
Because the propeller shaft runs down the center
of the boat, and the control axis of the tandem rudders
crosses the centerline as well, a jumper is used to
connect the rudders and prevent binding against the
shaft. Insert the rudders in their bearings and slide
their control shafts into the collars at each end of
the jumper. Tighten the set screws with the allen wrench.
Check the control horn for movement. If it binds against
the hull, remove the jumper and trim the control horn
to ensure proper clearance.
3.
Remove the rudder jumper. Drill a 1/16"
hole in the center of the control horn.
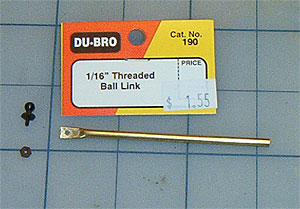
4.
Insert a clevis in the hole in the control horn. Thread
a length of rod into the clevis. NOTE: Most hobby stores
sell prefabbed Du-Bro rod & clevis sets. However,
they can be purchased separately and assembled.
5.
Reinstall the rudder jumper as shown. Work the control
rod to make sure the rudders move together and do not
bind. With the rudders centered, mark the control rod
approximately 2" from the WTC control rods. Cut the
rod at the mark.
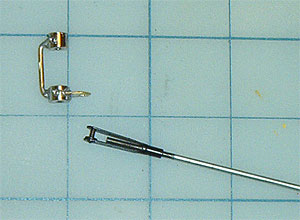
6.
Cut a 3" length of brass tube. Flatten 1/4"
of one end of the tube with a hammer. Drill a 1/16"
hole in the flattened area and insert a ball link.
7.
Drill a 3/32" hole in the top of the tube at the
open end as shown.
8.
Place a wheel collar over the open end of the tube and
tighten the set screw until it enters the hole. Slide
the brass tube onto the rudder control rod. Snap the ball
connector into the plastic quick connect threaded onto
the WTC control rod. Center the rudders and tighten the
wheel collar until it secures the rudder control rod to
the brass control tube. Power up your radio & WTC
and check the rudder operation. They should respond in
tandem without binding.