|
DETAIL
& PAINT - Detailing The Boat
 |
Deck
Fittings - Permit kits come with a selection
of white metal parts to represent all the major deck
fittings such as cleats, windlasses, etc. The hull is
molded to represent these fittings in their retracted,
at-sea positions. To depict them in their extended positions,
drill a pilot hole for each fitting in the upper hull
and file out the opening. Clean the flash from the white
metal part and insert it in the proper hole. From the
back side, apply epoxy to glue it in place.
|
 |
Stern
Light - 1. Drill a hole in the upper rudder to accept
the white metal part depicting the stern light beacon.
|
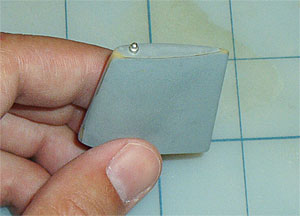 |
2.
Apply a drop of CA to the bottom of the stern light part
and insert it in the hole. |
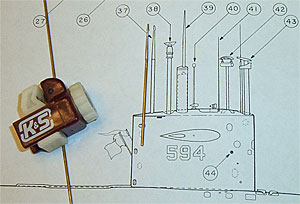 |
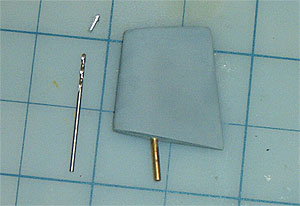
Periscopes
& Masts - An assortment of resin and metal parts
are included to depict the various periscopes and masts.
Using the plans, drill and file out holes in the sail
top for the masts you wish to install.
1.
For this project only the single attack periscope was
used. Cut a length of brass tube to represent the periscope
barrel. Clean the white metal periscope top and glue
it in one end with CA.
|
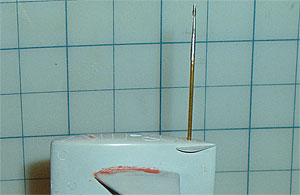 |
2.
Next, drill a hole in the sail top. Insert the periscope.
Friction will hold it in place during patrols. For other
masts, insert a small threaded rod in the bottom of the
mast. A washer and nut can then be applied from the inside
of the sail to hold it in place. |
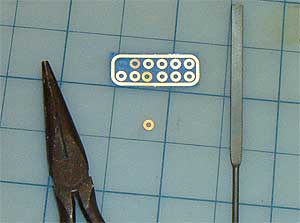 |
MBT
Vents - A tree of stainless steel photo-etched
Main Ballast Tank vents are supplied with the
kit.
1. Cut
or twist a vent from its tree. File off any rough
edges. Due to their tiny size, it is best to hold the
part with a pair of needle nosed pliers. To increase
grip and avoid scratching the part, wrap masking
tape around each half of the pliers. |
 |
2. Place
a drop of CA in the beveled part of the MBT vent then
insert the photo-etched part. It should lay flat with
the hull's surface. Early Permits had their
stainless steel vents painted black but at sea the
paint would quickly wear off. As a result, they
were left unpainted starting in the mid 1960's. |
| |
Zincs
- Once the final paint job is finished, the
zincs should be affixed to the stern. Their location
is indicated on the plans and scribed in the hull.
Place masking tape on either side of the scribe mark,
apply CA to the underside of the metal part and lay
it between the tape in the proper location. This
prevents the glue from damaging the adjacent paint.
As full scale zincs were unpainted, leave these parts
in their raw, white metal condition. |
| |
Next
|
|
|
Which
Permit?
The
ThorDesign Permit kit depicts USS Permit
(SSN-594) in it's as-built condition circa 1962. However,
the boats of this class served well into the 1990's
and underwent many modifications. To properly detail
your model, chose the specific boat and service period
you wish to depict and research her thoroughly. For
the purpose of these instructions, we chose to model
USS Thresher (SSN-593) at the time of her loss
on April 10, 1963.
The
following boats made up the Permit class:
- SSN-593
Thresher
-
SSN-594 Permit
-
SSN-595 Plunger
- SSN-596
Barb
- SSN-603
Pollack
- SSN-604
Haddo
-
SSN-605 Jack
-
SSN-606 Tinosa
-
SSN-607 Dace
- SSN-612
Guardfish
- SSN-613
Flasher
-
SSN-614 Greenling
- SSN-615
Gato
-
SSN-621 Haddock
|
|